> ## Documentation Index
> Fetch the complete documentation index at: https://invopop-singapore.mintlify.site/llms.txt
> Use this file to discover all available pages before exploring further.
# Stripe
> Import and process invoices and credit notes from Stripe
## Introduction
In this guide, you'll learn how to connect [Stripe](https://stripe.com/) with Invopop to automatically generate tax-compliant invoices and credit notes, from your Stripe dashboard.
The Stripe integration consists of two components:
1. An Invopop app within your Stripe dashboard
2. An app in your Invopop console
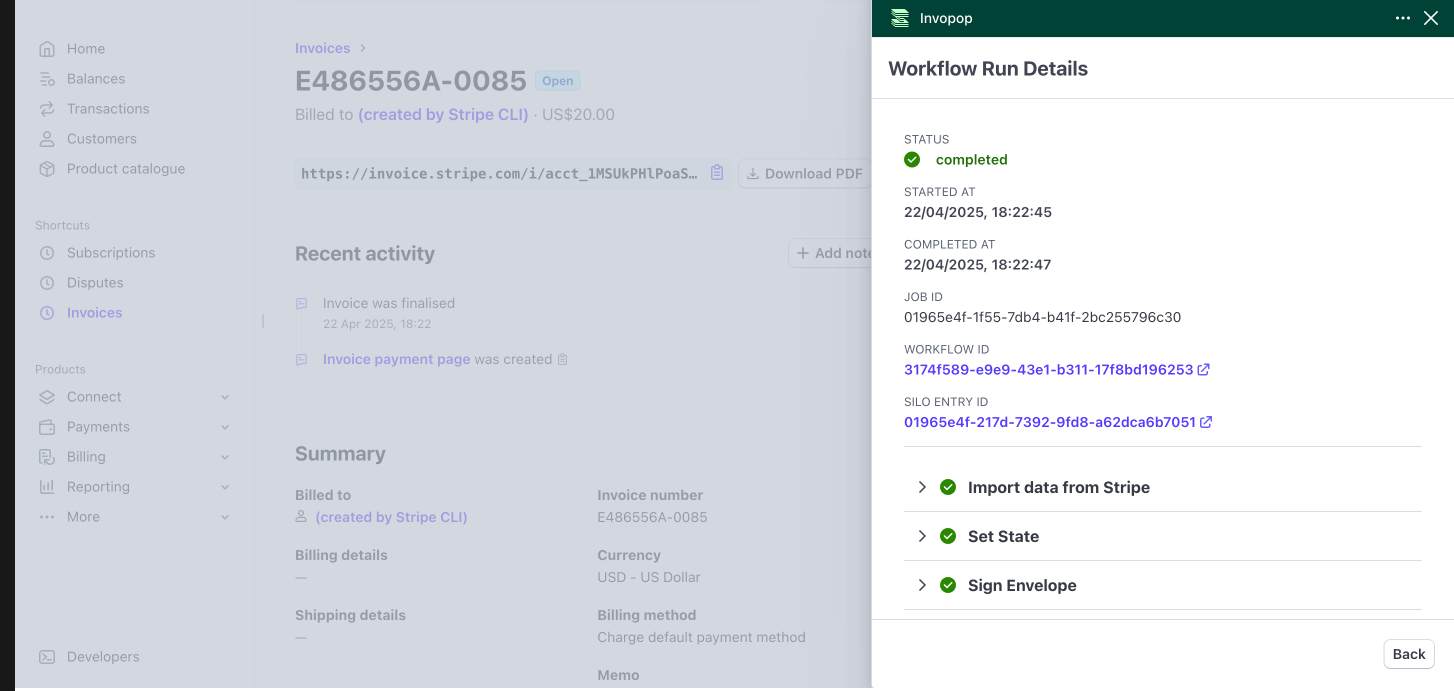
When a Stripe invoice or credit note reaches the [finalized status](https://support.stripe.com/questions/invoice-states), our integration will automatically create a new job in your selected Invopop workflow.
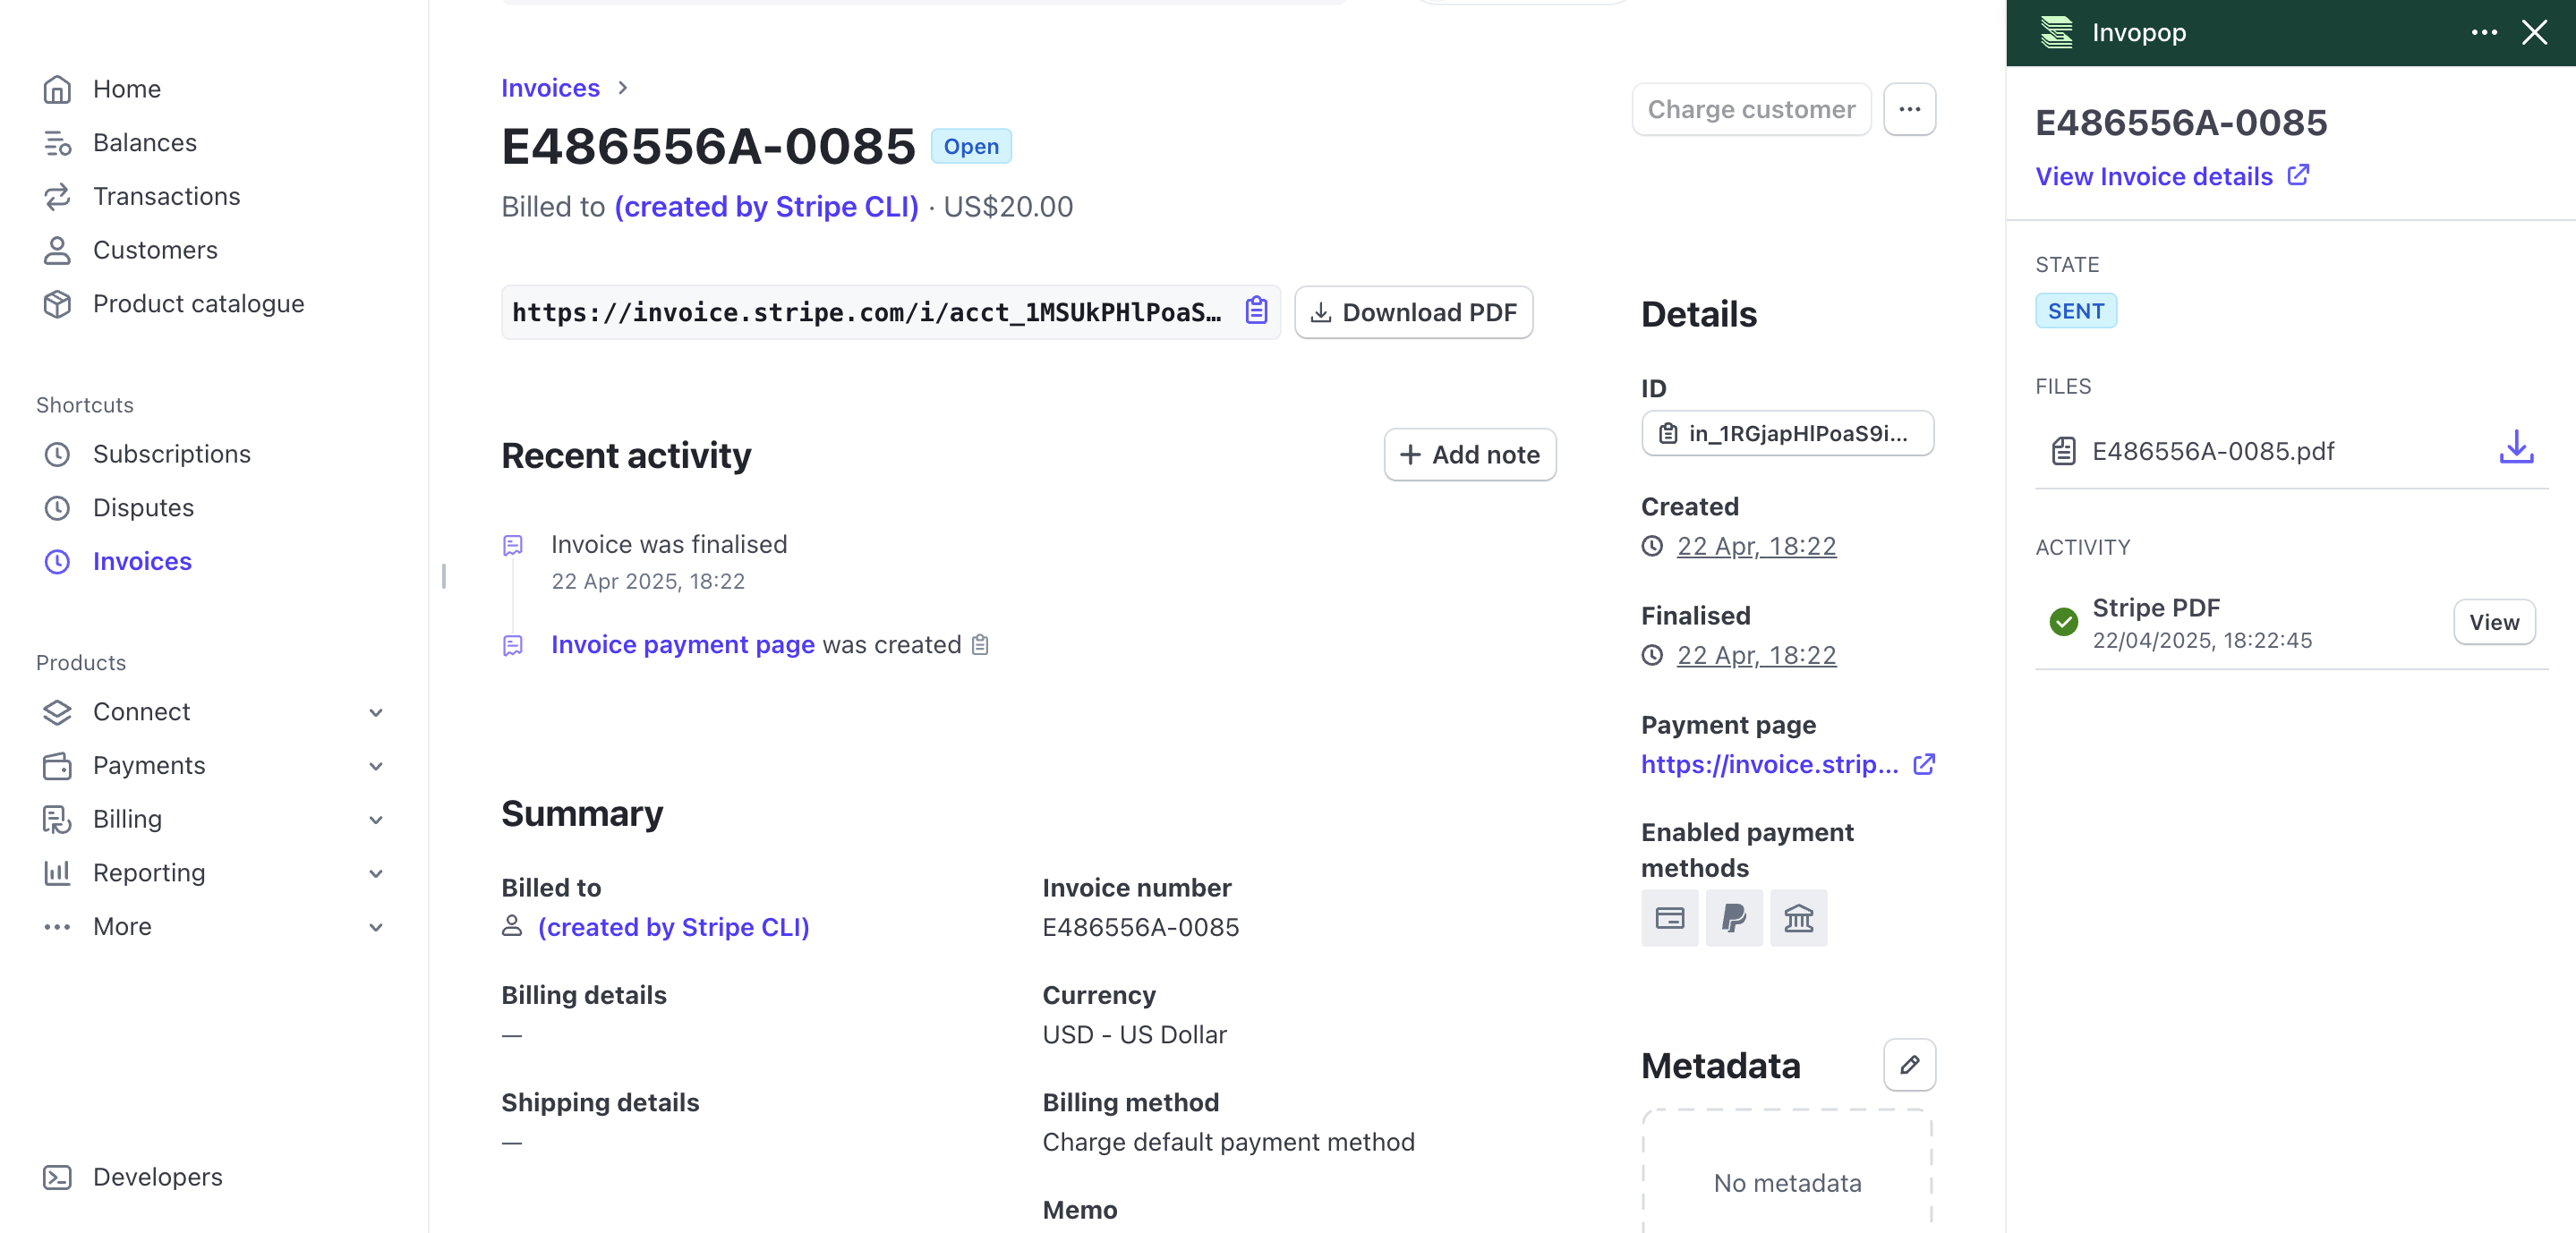 The job will extract the invoice data from Stripe and execute the actions, such as converting it to any e-invoice format and submitting it to your local tax authority.
 ## Setup
Before you begin, ensure you have an active Stripe account.
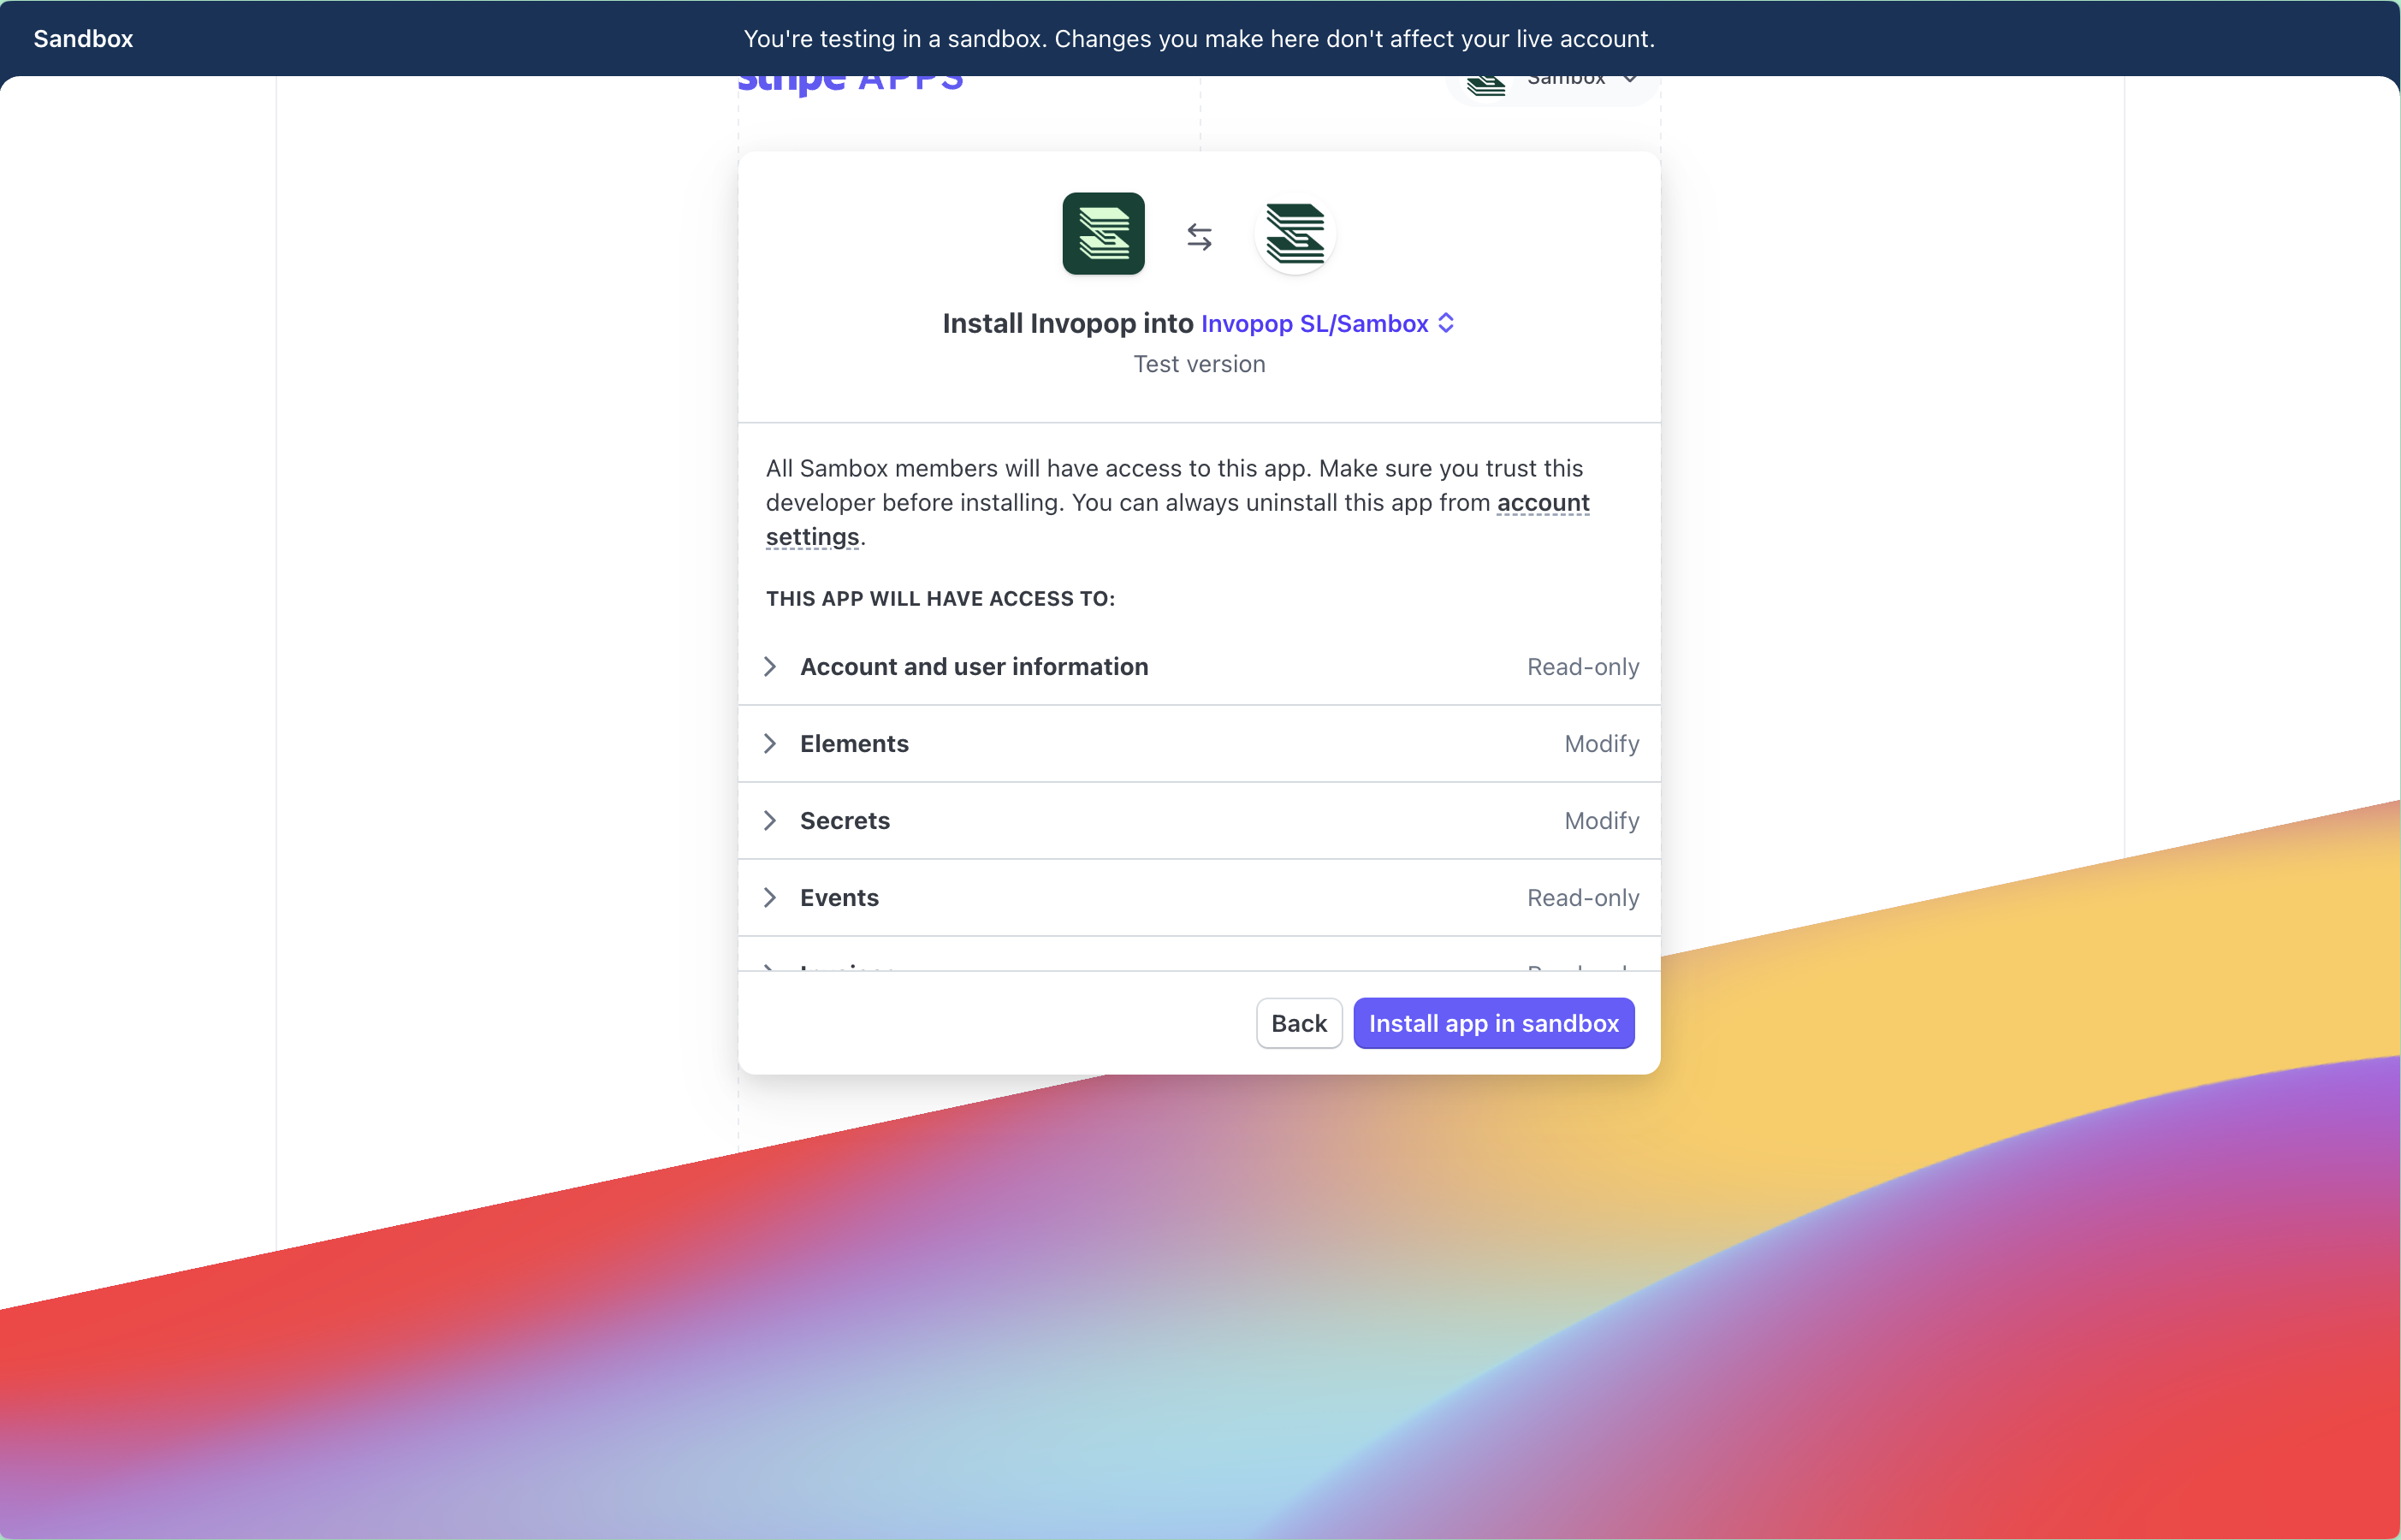
Navigate to the [Invopop app](https://marketplace.stripe.com/apps/invopop) in Stripe's App Marketplace and click **Install**.
Next, Stripe will prompt you to select the Stripe environment you'd like to connect to, you can start with test mode or sandbox and switch to live later.
## Setup
Before you begin, ensure you have an active Stripe account.
Navigate to the [Invopop app](https://marketplace.stripe.com/apps/invopop) in Stripe's App Marketplace and click **Install**.
Next, Stripe will prompt you to select the Stripe environment you'd like to connect to, you can start with test mode or sandbox and switch to live later.
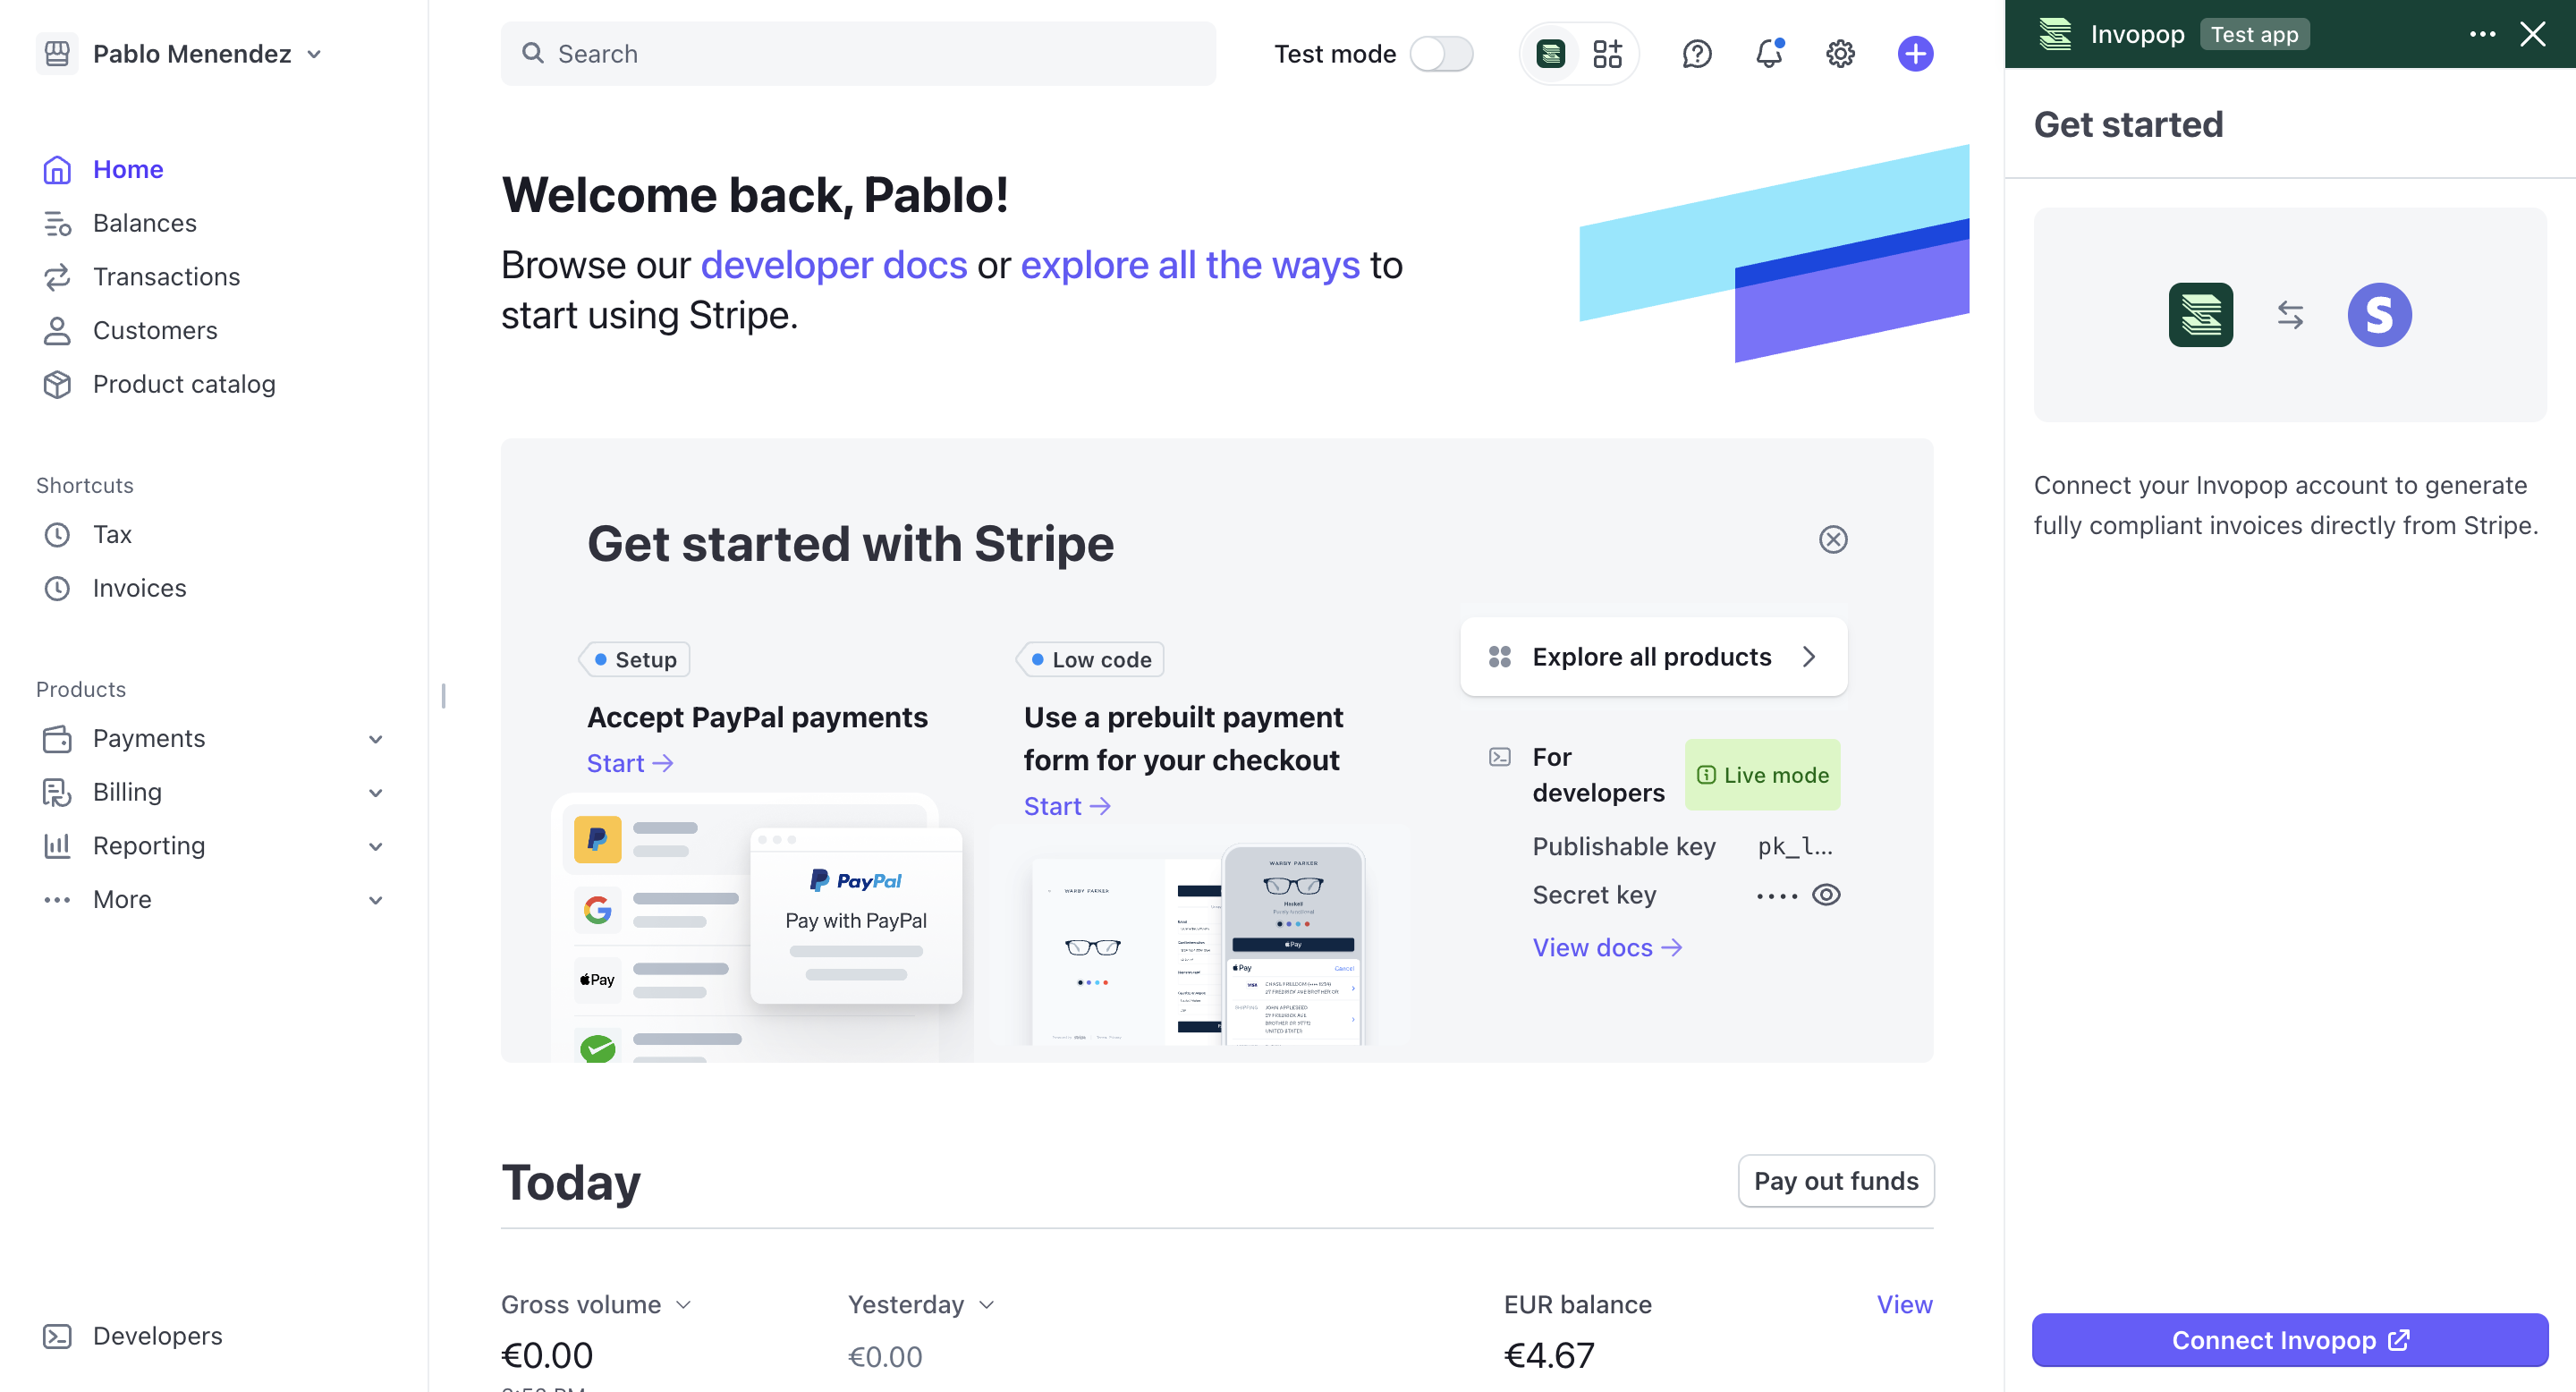
 After installation, you should be redirected to your Stripe dashboard and see the Invopop app in the right sidebar. Alternatively, just open the Invopop app in your [Stripe dashboard](https://dashboard.stripe.com/apps/invopop).
Click **Connect Invopop**. The next page will ask you to login to your Invopop account. If you're new to Invopop, the connection process will guide you through creating your Invopop account and setting up your first workspace.
When connecting a test or sandbox environment in Stripe, select a sandbox workspace in Invopop. For live environments, select a live workspace.
After installation, you should be redirected to your Stripe dashboard and see the Invopop app in the right sidebar. Alternatively, just open the Invopop app in your [Stripe dashboard](https://dashboard.stripe.com/apps/invopop).
Click **Connect Invopop**. The next page will ask you to login to your Invopop account. If you're new to Invopop, the connection process will guide you through creating your Invopop account and setting up your first workspace.
When connecting a test or sandbox environment in Stripe, select a sandbox workspace in Invopop. For live environments, select a live workspace.
 After connecting your Invopop account to Stripe, you'll be redirected back to Stripe to choose the workspace where you want to process your invoices.
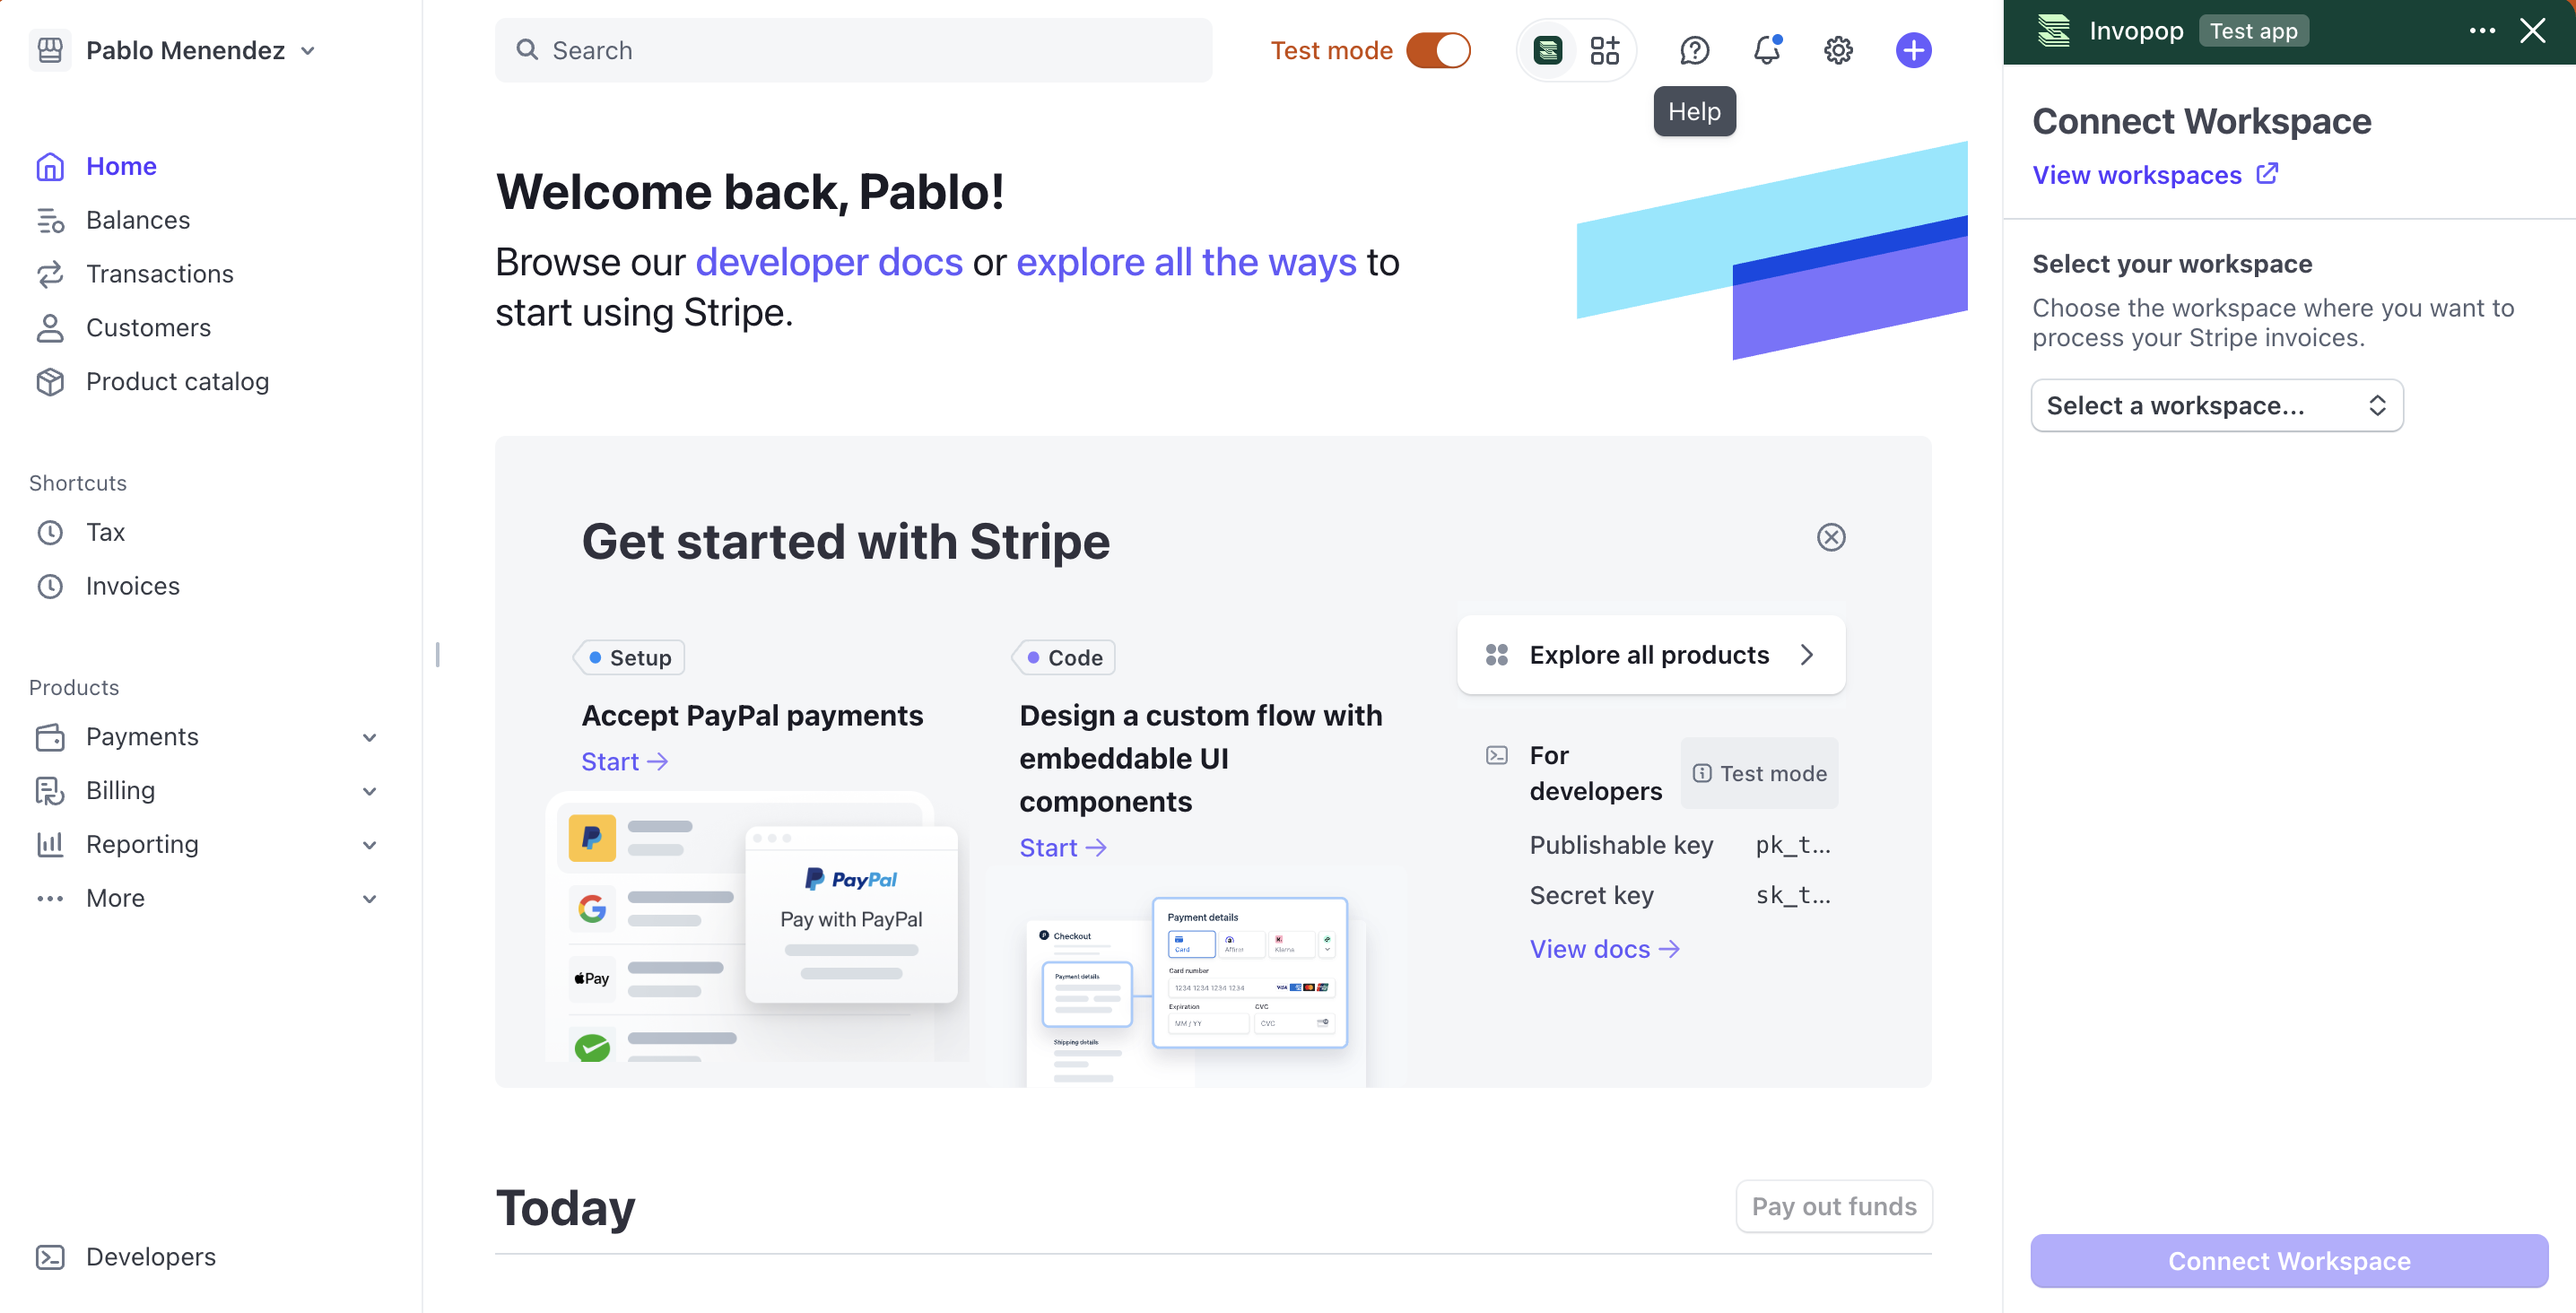 Select or create a workflow to process your invoices and credit notes.
To use an existing workflow select it from the Stripe's sidebar menu and click **Save Workflow**
To create a new workflow click on **Create New Workflow** in the sidebar menu. You'll be redirected to Invopop.
Select one of the following workflow templates:
This workflow will sync with Stripe to issue a VERI\*\FACTU invoice on finalized sales.
This workflow will sync with Stripe to generate a PDF invoice on finalized sales.
Copy and paste into a new [Empty Invoice workflow](https://console.invopop.com/redirect/workflows/new?template=empty-invoice) code view.
This workflow demonstrates the Stripe integration with a basic PDF workflow.
```json Example Stripe to VERI*FACTU Workflow theme={"system"}
{
"name": "Stripe sync and convert to VERI*FACTU",
"description": "Issue a Verifactu invoice in Spain from Stripe",
"schema": "bill/invoice",
"steps": [
{
"id": "7dd8e370-139b-11f0-b939-af2e8ae705ac",
"name": "Import data from Stripe",
"provider": "stripe.import"
},
{
"id": "95a82a10-139b-11f0-b939-af2e8ae705ac",
"name": "Set State",
"provider": "silo.state",
"summary": "Set state to `processing`{.state .processing}",
"config": {
"state": "processing"
}
},
{
"id": "794f78d0-139d-11f0-9ab7-c391120166e0",
"name": "Modify Silo Entry",
"provider": "silo.modify",
"summary": "Modifications configured",
"config": {
"addons": [
"es-verifactu-v1"
],
"allow_invalid_json": false,
"data": {
"doc": {
"notes": [
{
"key": "general",
"text": "Factura"
}
]
}
},
"expr": "",
"merge_type": "application/merge-patch+json",
"sign": false,
"tags": []
}
},
{
"id": "84cf92a0-139b-11f0-b939-af2e8ae705ac",
"name": "Sign Envelope",
"provider": "silo.close"
},
{
"id": "fc307c60-139b-11f0-b939-af2e8ae705ac",
"name": "Generate Verifactu (Spain)",
"provider": "verifactu.generate"
},
{
"id": "fe479c90-139b-11f0-b939-af2e8ae705ac",
"name": "Send Verifactu (Spain)",
"provider": "verifactu.send"
},
{
"id": "86a5b230-139b-11f0-b939-af2e8ae705ac",
"name": "Generate PDF",
"provider": "pdf",
"summary": "Spanish - A4",
"config": {
"date_format": "%Y-%m-%d",
"layout": "A4",
"locale": "es",
"logo_height": 40
}
},
{
"id": "8b321820-139b-11f0-b939-af2e8ae705ac",
"name": "Set State",
"provider": "silo.state",
"summary": "Set state to `sent`{.state .sent}",
"config": {
"state": "sent"
}
}
],
"rescue": [
{
"id": "90f4b420-139b-11f0-b939-af2e8ae705ac",
"name": "Set State",
"provider": "silo.state",
"summary": "Set state to `error`{.state .error}",
"config": {
"state": "error"
}
}
]
}
```
This workflow demonstrates the Stripe integration with country-specific functionality.
```json Example Stripe Workflow with States theme={"system"}
{
"name": "Stripe sync and generate PDF",
"description": "Generate a PDF from a Stripe sale",
"schema": "bill/invoice",
"steps": [
{
"id": "7dd8e370-139b-11f0-b939-af2e8ae705ac",
"name": "Import data from Stripe",
"provider": "stripe.import"
},
{
"id": "95a82a10-139b-11f0-b939-af2e8ae705ac",
"name": "Set State",
"provider": "silo.state",
"summary": "Set state to `processing`{.state .processing}",
"config": {
"state": "processing"
}
},
{
"id": "84cf92a0-139b-11f0-b939-af2e8ae705ac",
"name": "Sign Envelope",
"provider": "silo.close"
},
{
"id": "86a5b230-139b-11f0-b939-af2e8ae705ac",
"name": "Generate PDF",
"provider": "pdf",
"summary": "Spanish - A4",
"config": {
"date_format": "%Y-%m-%d",
"layout": "A4",
"locale": "es",
"logo_height": 40
}
},
{
"id": "8b321820-139b-11f0-b939-af2e8ae705ac",
"name": "Set State",
"provider": "silo.state",
"summary": "Set state to `sent`{.state .sent}",
"config": {
"state": "sent"
}
}
],
"rescue": [
{
"id": "90f4b420-139b-11f0-b939-af2e8ae705ac",
"name": "Set State",
"provider": "silo.state",
"summary": "Set state to `error`{.state .error}",
"config": {
"state": "error"
}
}
]
}
```
In [Console](https://console.invopop.com) create a new workflow and select [Empty Invoice workflow](https://console.invopop.com/redirect/workflows/new?template=empty-invoice) in the template selector, then add the following steps:
Select or create a workflow to process your invoices and credit notes.
To use an existing workflow select it from the Stripe's sidebar menu and click **Save Workflow**
To create a new workflow click on **Create New Workflow** in the sidebar menu. You'll be redirected to Invopop.
Select one of the following workflow templates:
This workflow will sync with Stripe to issue a VERI\*\FACTU invoice on finalized sales.
This workflow will sync with Stripe to generate a PDF invoice on finalized sales.
Copy and paste into a new [Empty Invoice workflow](https://console.invopop.com/redirect/workflows/new?template=empty-invoice) code view.
This workflow demonstrates the Stripe integration with a basic PDF workflow.
```json Example Stripe to VERI*FACTU Workflow theme={"system"}
{
"name": "Stripe sync and convert to VERI*FACTU",
"description": "Issue a Verifactu invoice in Spain from Stripe",
"schema": "bill/invoice",
"steps": [
{
"id": "7dd8e370-139b-11f0-b939-af2e8ae705ac",
"name": "Import data from Stripe",
"provider": "stripe.import"
},
{
"id": "95a82a10-139b-11f0-b939-af2e8ae705ac",
"name": "Set State",
"provider": "silo.state",
"summary": "Set state to `processing`{.state .processing}",
"config": {
"state": "processing"
}
},
{
"id": "794f78d0-139d-11f0-9ab7-c391120166e0",
"name": "Modify Silo Entry",
"provider": "silo.modify",
"summary": "Modifications configured",
"config": {
"addons": [
"es-verifactu-v1"
],
"allow_invalid_json": false,
"data": {
"doc": {
"notes": [
{
"key": "general",
"text": "Factura"
}
]
}
},
"expr": "",
"merge_type": "application/merge-patch+json",
"sign": false,
"tags": []
}
},
{
"id": "84cf92a0-139b-11f0-b939-af2e8ae705ac",
"name": "Sign Envelope",
"provider": "silo.close"
},
{
"id": "fc307c60-139b-11f0-b939-af2e8ae705ac",
"name": "Generate Verifactu (Spain)",
"provider": "verifactu.generate"
},
{
"id": "fe479c90-139b-11f0-b939-af2e8ae705ac",
"name": "Send Verifactu (Spain)",
"provider": "verifactu.send"
},
{
"id": "86a5b230-139b-11f0-b939-af2e8ae705ac",
"name": "Generate PDF",
"provider": "pdf",
"summary": "Spanish - A4",
"config": {
"date_format": "%Y-%m-%d",
"layout": "A4",
"locale": "es",
"logo_height": 40
}
},
{
"id": "8b321820-139b-11f0-b939-af2e8ae705ac",
"name": "Set State",
"provider": "silo.state",
"summary": "Set state to `sent`{.state .sent}",
"config": {
"state": "sent"
}
}
],
"rescue": [
{
"id": "90f4b420-139b-11f0-b939-af2e8ae705ac",
"name": "Set State",
"provider": "silo.state",
"summary": "Set state to `error`{.state .error}",
"config": {
"state": "error"
}
}
]
}
```
This workflow demonstrates the Stripe integration with country-specific functionality.
```json Example Stripe Workflow with States theme={"system"}
{
"name": "Stripe sync and generate PDF",
"description": "Generate a PDF from a Stripe sale",
"schema": "bill/invoice",
"steps": [
{
"id": "7dd8e370-139b-11f0-b939-af2e8ae705ac",
"name": "Import data from Stripe",
"provider": "stripe.import"
},
{
"id": "95a82a10-139b-11f0-b939-af2e8ae705ac",
"name": "Set State",
"provider": "silo.state",
"summary": "Set state to `processing`{.state .processing}",
"config": {
"state": "processing"
}
},
{
"id": "84cf92a0-139b-11f0-b939-af2e8ae705ac",
"name": "Sign Envelope",
"provider": "silo.close"
},
{
"id": "86a5b230-139b-11f0-b939-af2e8ae705ac",
"name": "Generate PDF",
"provider": "pdf",
"summary": "Spanish - A4",
"config": {
"date_format": "%Y-%m-%d",
"layout": "A4",
"locale": "es",
"logo_height": 40
}
},
{
"id": "8b321820-139b-11f0-b939-af2e8ae705ac",
"name": "Set State",
"provider": "silo.state",
"summary": "Set state to `sent`{.state .sent}",
"config": {
"state": "sent"
}
}
],
"rescue": [
{
"id": "90f4b420-139b-11f0-b939-af2e8ae705ac",
"name": "Set State",
"provider": "silo.state",
"summary": "Set state to `error`{.state .error}",
"config": {
"state": "error"
}
}
]
}
```
In [Console](https://console.invopop.com) create a new workflow and select [Empty Invoice workflow](https://console.invopop.com/redirect/workflows/new?template=empty-invoice) in the template selector, then add the following steps:
 1. Add the **Import data from Stripe** step as the first step of the workflow.
2. Configure the workflow according to your local regulations. You can copy *the Basic PDF workflow* example below and modify it later for your local needs.
Finally, in the Error Handling area, add the **Set State** action and select "Error" in the State dropdown.
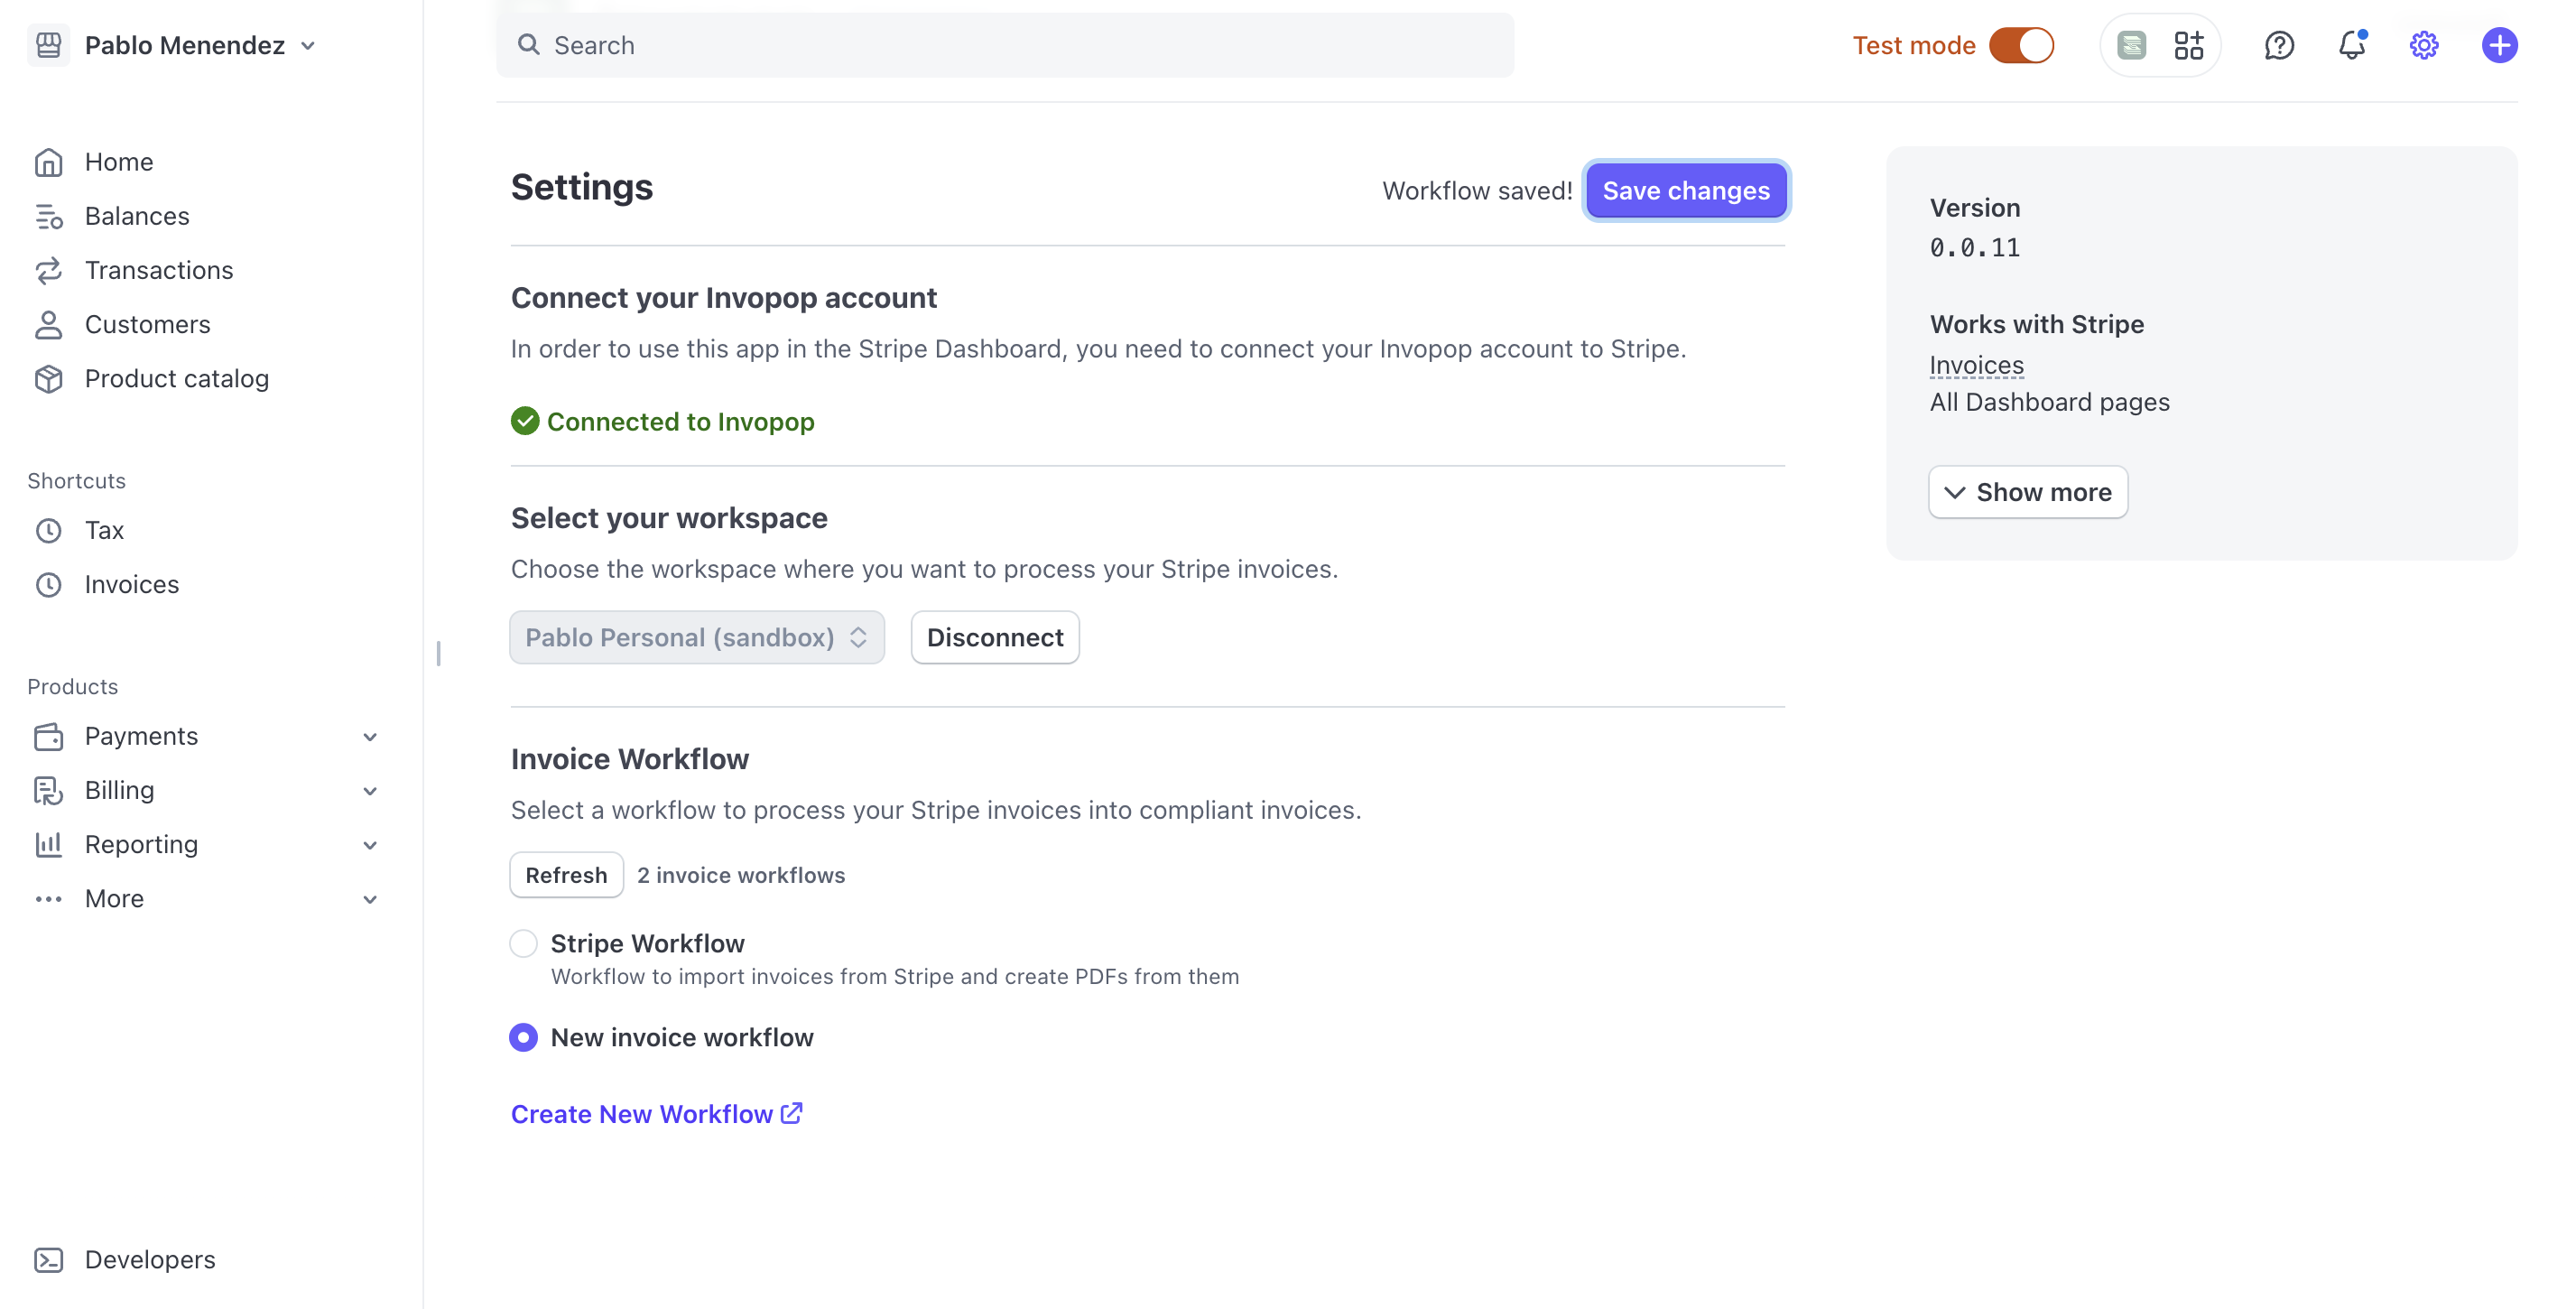
1. Navigate to [Stripe app settings](https://dashboard.stripe.com/settings/apps/com.invoicing.invopop)
2. Confirm your workflow configuration is correct
1. Add the **Import data from Stripe** step as the first step of the workflow.
2. Configure the workflow according to your local regulations. You can copy *the Basic PDF workflow* example below and modify it later for your local needs.
Finally, in the Error Handling area, add the **Set State** action and select "Error" in the State dropdown.
1. Navigate to [Stripe app settings](https://dashboard.stripe.com/settings/apps/com.invoicing.invopop)
2. Confirm your workflow configuration is correct
 ## FAQ
Yes, you can, at any time select a different workflow to sync your Stripe invoices. You can do this both from Stripe or Invopop.
Option 1: From Stripe
1. Go to [Stripe app settings](https://dashboard.stripe.com/settings/apps/com.invoicing.invopop)
2. Select a different workflow
3. Click **Save changes**
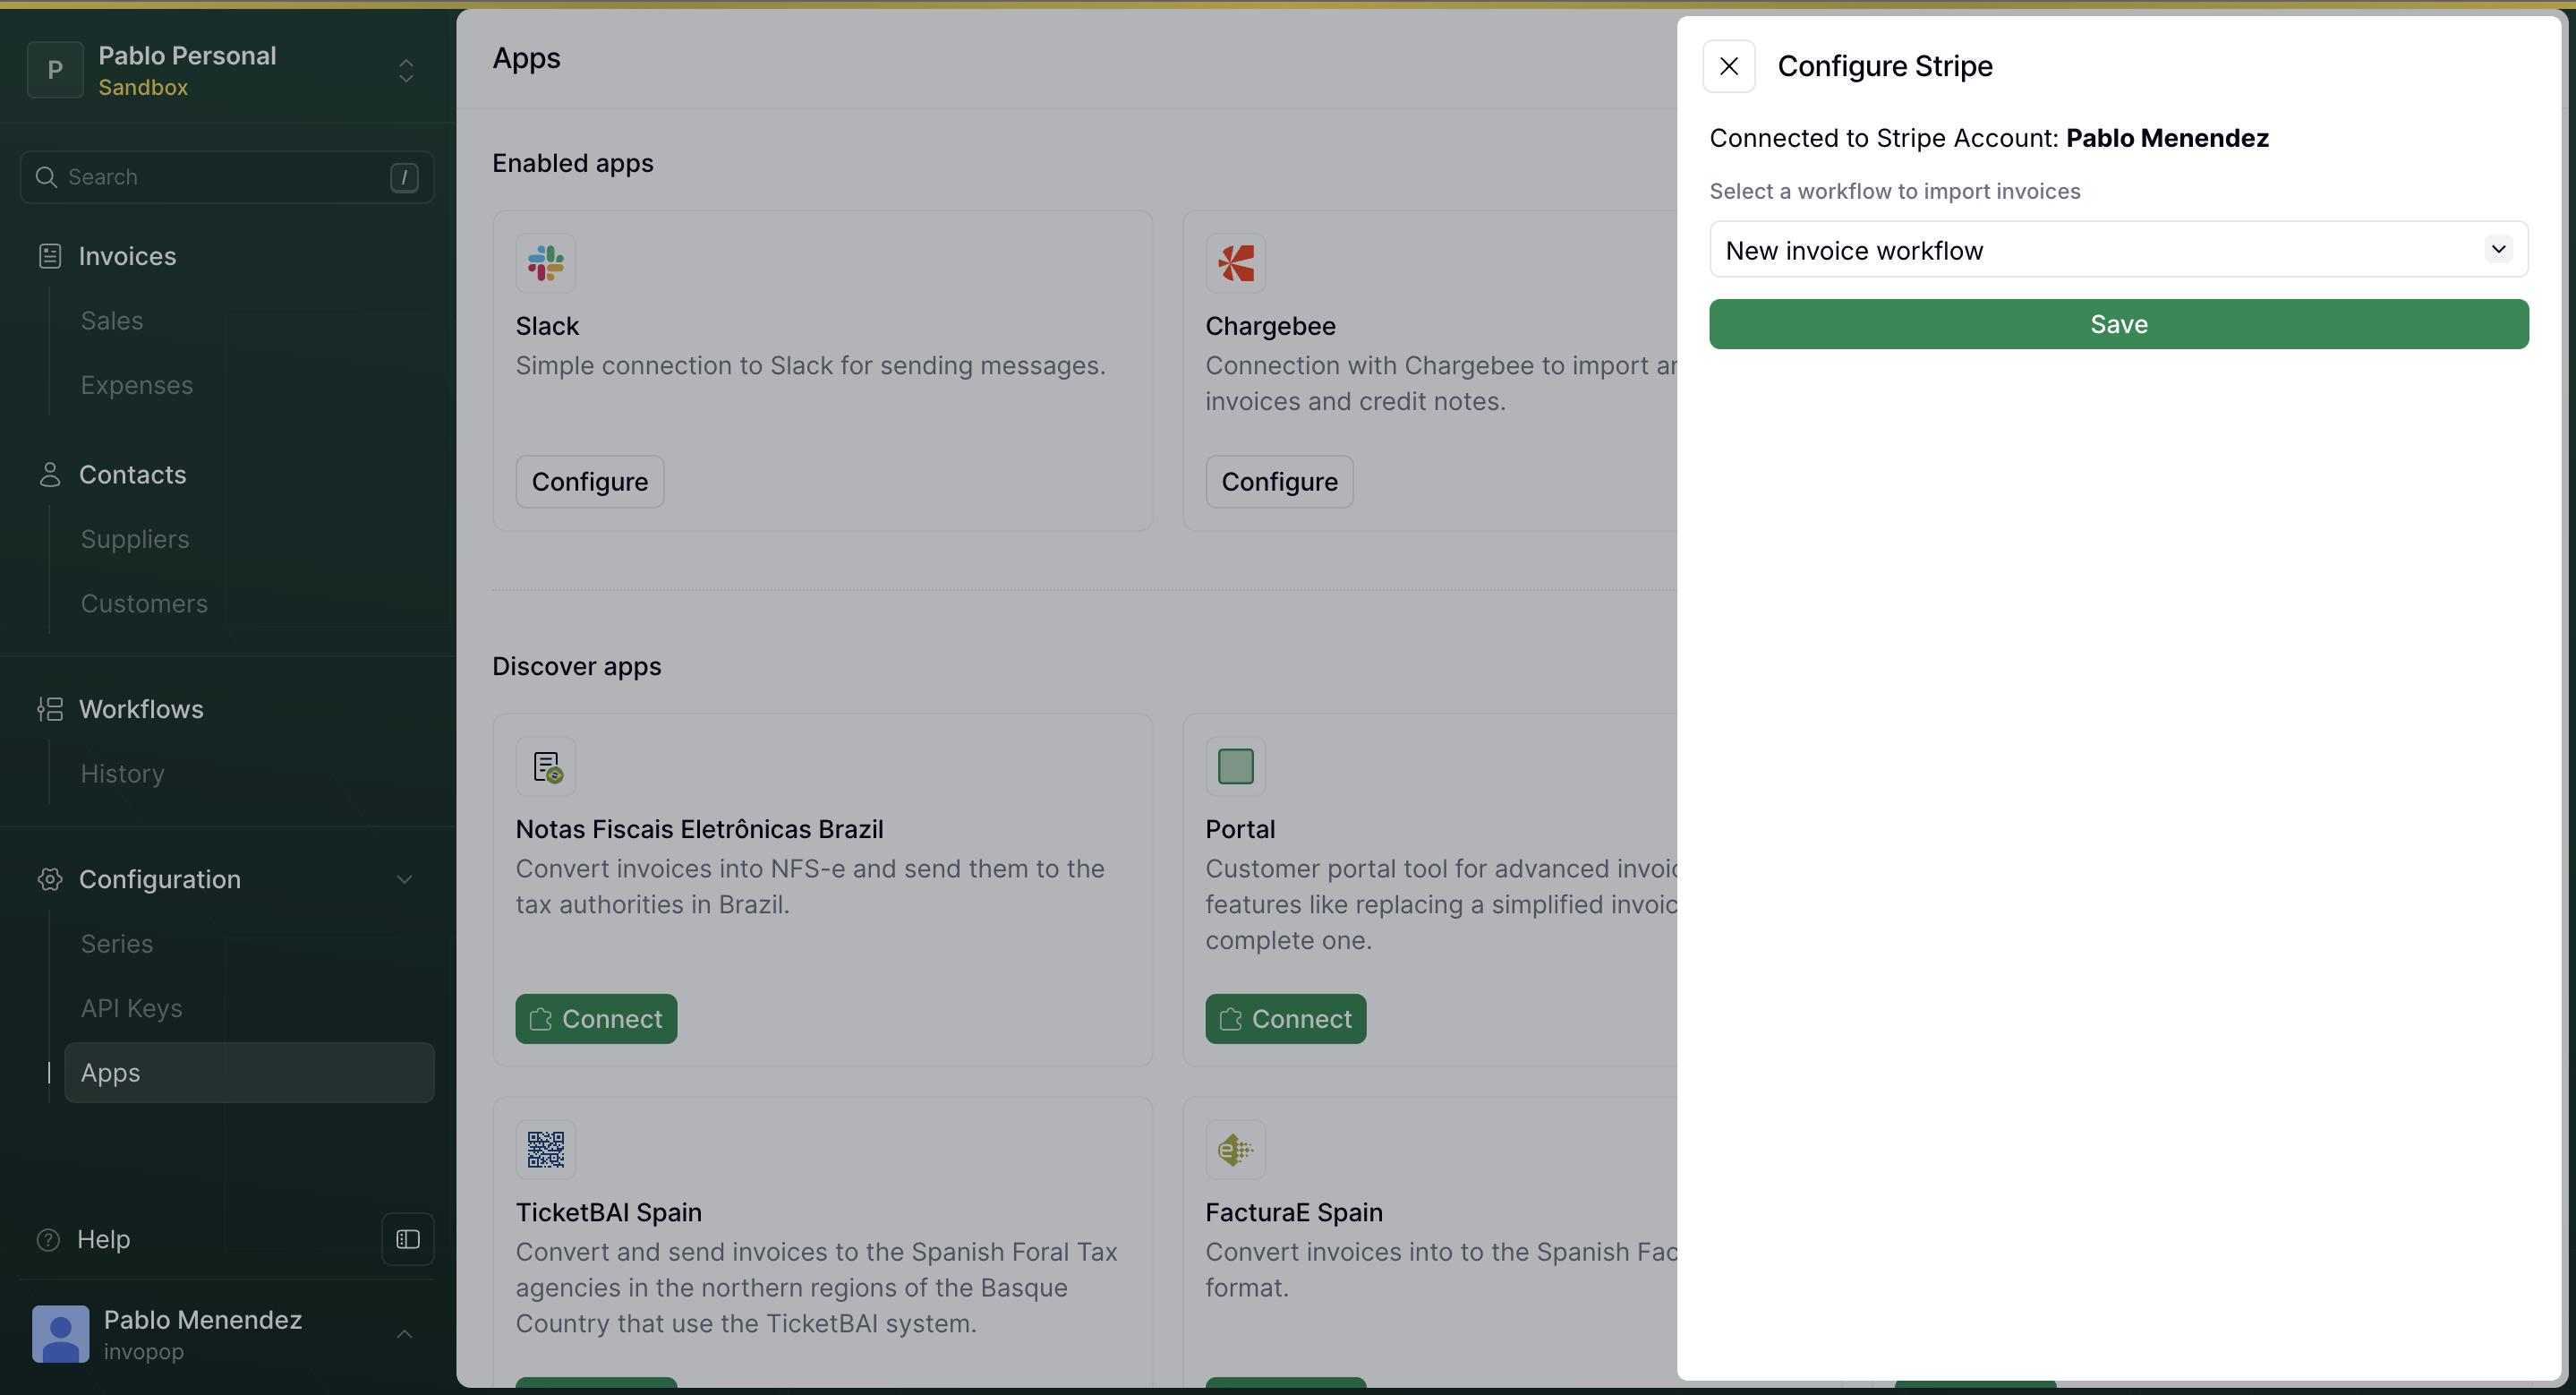
Option 2: Through Invopop
1. Navigate to the **Apps** section in your (Invopop console)\[[https://console.invopop.com/](https://console.invopop.com/)]
2. Locate the Stripe app settings
3. Select your new workflow
## FAQ
Yes, you can, at any time select a different workflow to sync your Stripe invoices. You can do this both from Stripe or Invopop.
Option 1: From Stripe
1. Go to [Stripe app settings](https://dashboard.stripe.com/settings/apps/com.invoicing.invopop)
2. Select a different workflow
3. Click **Save changes**
Option 2: Through Invopop
1. Navigate to the **Apps** section in your (Invopop console)\[[https://console.invopop.com/](https://console.invopop.com/)]
2. Locate the Stripe app settings
3. Select your new workflow
 You can switch to the Stripe connection to a different workspace by disconnecting and reconnecting the app.
1. Go to [Stripe app settings](https://dashboard.stripe.com/settings/apps/com.invoicing.invopop)
2. Click the **Disconnect** button
3. Reconnect the app and select your new workspace
You can switch to the Stripe connection to a different workspace by disconnecting and reconnecting the app.
1. Go to [Stripe app settings](https://dashboard.stripe.com/settings/apps/com.invoicing.invopop)
2. Click the **Disconnect** button
3. Reconnect the app and select your new workspace